




Comics · Comiiic Learn
How to Make a Comic: From Idea to Finished Page
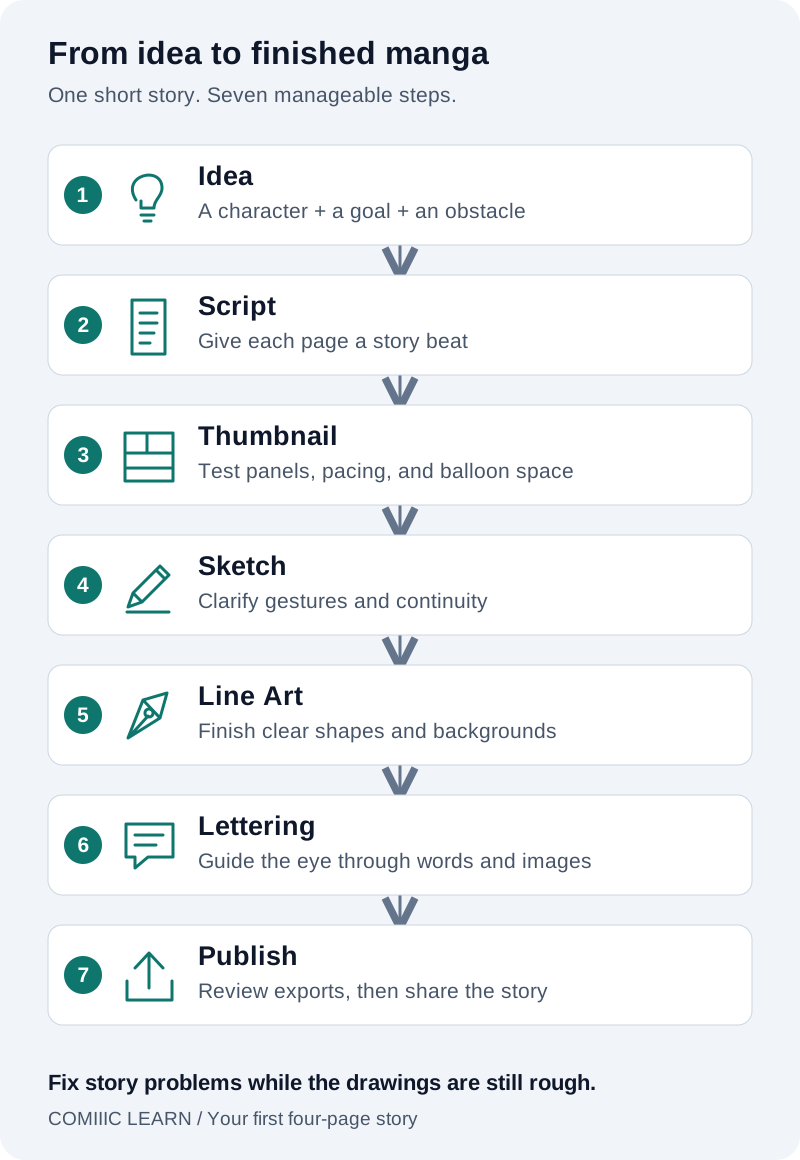
To make a comic, give a character a goal, put an obstacle in the way, and show the choice that changes the situation. Turn that short story into a page script, test it with thumbnails, then finish the drawings and lettering. Review the exported pages as a reader before publishing them.
This guide helps you finish a four-page short comic, on paper or digitally. It follows one example: a student finds a lost sketchbook at a bus stop just as its owner boards a bus. The project is small enough to complete, but it still needs a setup, pressure, a decision, and a payoff. The related digital drawing guide covers tools and individual drawing techniques; here the focus is how the whole story holds together.
1. Start With a Simple Comic Idea
Write one sentence with a person, a want, and an obstacle: “A shy student wants to return a lost sketchbook, but its owner is leaving on the bus.” That is enough to begin. A setting or character design can inspire you, but a drawable action gives the reader something to follow.
For this first project, set a four-page limit, use two main characters, and keep the action at one bus stop. These are practice constraints, not rules for comics. They reduce the number of locations and introductions you must explain so you can spend your effort on a clear ending.
2. Turn Your Idea Into a Story
Build four connected beats. Each one should cause the next: finding the book creates a reason to act; the closing bus doors create urgency; calling out requires a choice; returning the book makes a connection possible. If two beats could trade places without changing anything, check whether one is only background information.
- Page 1 — Setup: the student notices a sketchbook on the bench and recognizes its owner through the bus window.
- Page 2 — Pressure: the doors begin to close. The student starts to speak, then freezes.
- Page 3 — Choice: the student raises the sketchbook and calls out. The owner notices; the bus remains stopped and the doors reopen.
- Page 4 — Payoff: the owner steps back onto the pavement, takes the book, and sketches the student. The student smiles.
The ending answers the question raised by the premise: will the student return the book? The sketch adds an emotional result. You do not need a twist or a cliffhanger. For a first short manga, a resolved small problem is a useful finish line.
3. Write a Manga Script You Can Draw
Separate visible action from dialogue. “She is anxious” is an intention; “she grips the book, opens her mouth, and says nothing” gives you images to draw. Write one main moment per panel. If a description includes finding, opening, and handing over the book, split those actions or choose the moment that tells the reader most.
Draft all four pages before polishing the first. Give each page a job and mark the beat that deserves the most space. Read dialogue aloud and remove words already communicated by the image. Keep working notes such as camera angle separate from text that will actually appear on the page.
4. Plan Pages With Thumbnails
Draw all four pages as small rectangles. Use stick figures, panel borders, and rough balloons. Choose a reading direction and make it consistent throughout. Manga can be presented in different reading formats; establish yours deliberately rather than reversing a completed page and accidentally mirroring its words or props.
Try two layouts for page 2: three equally sized panels, then two smaller panels above a large closing-door panel. Compare how long the hesitation feels. Panel size, repetition, and the information you withhold can change pacing without adding dialogue. In a page-turn format, put the choice after the turn; for scrolling, preview the space before that reveal on a phone.
- Trace the reading path with your finger, including every balloon. If you must jump backward, move a panel or balloon.
- Cover the dialogue. Can you still identify the book, its owner, and the moment the student decides to act?
- Look at the four thumbnails together. Does each page move the situation forward, and is the final reaction given enough room?
5. Draw the Rough Sketch
Enlarge the chosen layouts and solve poses, expressions, and object placement across the whole story. Keep the sketchbook recognizable with one simple feature, such as a dark elastic band. Make a small reference sheet for the two characters and the book so you are not redesigning them from panel to panel.
Sketch the hardest storytelling panel first: the raised book must be visible to both the owner and the reader. Check the line of sight through the window. Then rough out every page, leaving the planned balloon space intact. Working across the short story lets you catch continuity problems before one beautifully finished page locks you into a confusing layout.
6. Create the Line Art
Choose a finish you can sustain for four pages. A simple black-and-white style with a few solid shadows is enough. Complete one representative panel to decide how much detail you want, then use it as a reference for the remaining pages. Avoid making the opening page so elaborate that the last page becomes impossible to finish.
Prioritize the book, the student’s gesture, and the owner’s response. Keep less important detail quiet around them. On each page, check the drawings at reading size before adding texture. For brush setup, layers, and line control, use the related digital drawing guide below; the production goal here is a consistent, understandable sequence.
7. Add Backgrounds That Keep the Scene Clear
Draw a tiny overhead map showing the bench, the student, and the stopped bus. Use it to check where everyone stands and which way they look. An establishing panel can show the whole stop, while later close-ups need only enough background to keep the action grounded.
Make a continuity pass before adding decorative detail. The book starts on the bench, moves into the student’s hands, then returns to the owner. The owner begins inside the bus and steps out only after the doors reopen. A missing transition can confuse readers even when each individual drawing looks convincing.
Use the same few landmarks across the sequence: the bench edge, a stop sign, and the bus door. Repeating them helps orient the reader. Leave a quieter area around the final shared look so the emotional payoff has room to register.
8. Add Speech Bubbles and Lettering
Replace the placeholder balloons with final dialogue while preserving the reading path you tested. Make the speaker clear before the reader reaches the tail. Check the page at its intended display size; if a balloon needs tiny letters to fit, shorten the line or enlarge the space.
For this story, three lines may be enough: “Excuse…”, “Your sketchbook!”, and “Thank you.” Let the final drawing and smile carry the rest. Silence still takes space: do not crowd the last panel with an explanation of feelings the reader can already see.
Read only the words in sequence, then read images and words together. Watch for repeated information, unclear speakers, and sound effects that look like dialogue. Keep an editable copy of the text so corrections or future translations do not require redrawing the page.
9. Review and Export Your Manga
Review the short manga in three passes: story, continuity, then presentation. This keeps small cleanup jobs from distracting you from a missing story beat. Save an editable master and prepare separate exports for your chosen destination; use that destination’s current size and file requirements.
- Story: can a new reader explain what the student wants, what stops them, and what changes at the end?
- Continuity: check the book, the bus doors, character positions, and page order across all four pages.
- Presentation: open the exported files outside the editor. Check text size, clipped balloons, accidental marks, margins, and missing artwork.
Name exports in reading order, such as sketchbook-01.png through sketchbook-04.png. Preview the full sequence on the screen where it will be read, including the ending. If you discover a problem, correct the master and export again instead of patching only the flattened image.
10. Publish Your Manga Online
Prepare a title, a thumbnail, and a description that states the premise without giving away the payoff. For example: “The Last Stop — A shy student has one moment to return a stranger’s sketchbook.” Use artwork and fonts you have permission to publish, and include credits where needed.
Upload the four pages in order and inspect the reader preview. Confirm that the selected reading format matches your layout, that no page is missing, and that the last page is actually last. On Comiiic, use Studio to prepare the upload and check the publication settings before sharing it.
Ask a reader two specific questions: “Why did the student hesitate?” and “What happened after the book was returned?” Their answers show whether the emotional turn and ending came through. If they misunderstand, identify the earliest panel that could supply the missing clue.
11. Make Your Next Chapter
Write a brief production note: what took the longest, where a reader became confused, and which decision helped you finish. Choose one improvement for the next short story, such as clearer gestures or more deliberate page turns. Changing everything at once makes it harder to tell what helped.
If you continue these characters, give the next chapter its own immediate goal and resolution. Perhaps the student agrees to draw with the sketchbook’s owner but is afraid to show their work. Keep the first story’s ending intact; a sequel should grow from the connection, not undo the payoff just to keep the plot going.